Dancing Dove Creations

Wednesday, May 24, 2006

Paint Along Step 4


My daughter ended up taking and extra long nap today, so after step 3 had sat on the easel for a while and I had walked by and looked at it several times I finally had some idea of what I wanted to do for step 4. I figured I should take advantage of her sleepiness while I could!

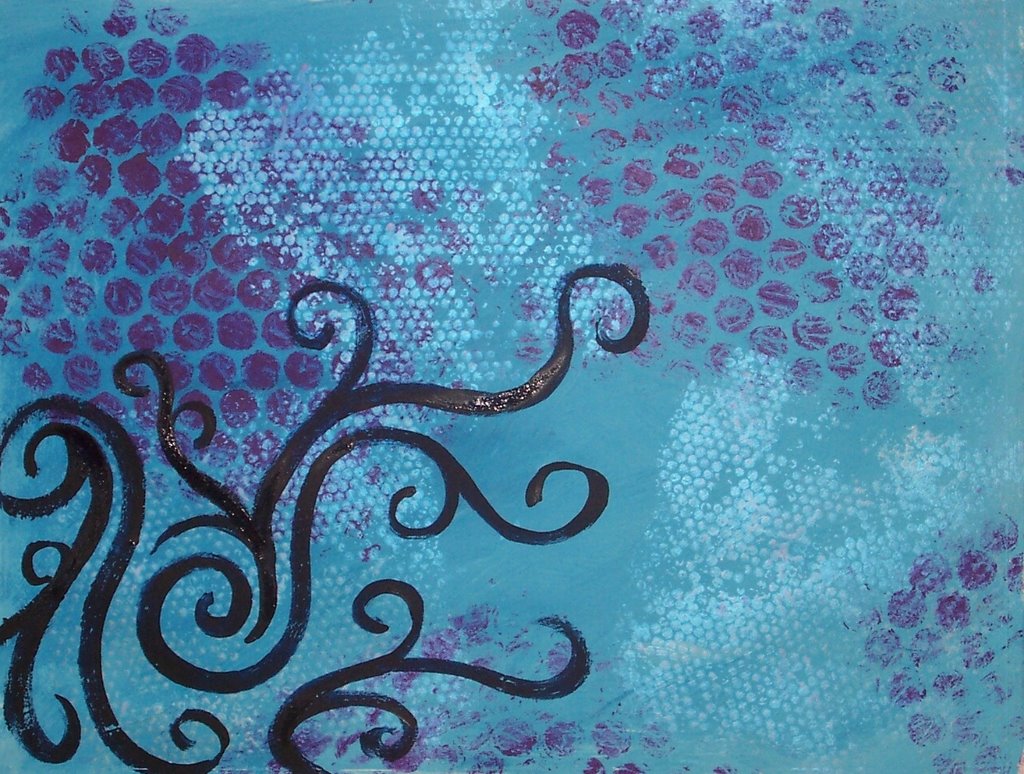
Step 4 was using a spray bottle and some sort of mask/stencils to add a new layer to our paintings. I formed chenille stems into more curlies and then sprayed Golden fluid acrylic paint in Pyrrole Red over them with a recycled travel size hair spray bottle. I also used a piece of paper towel torn into the shape of a wide triangle to mask the blue/black swirlies during the first spraying, then I removed the paper towel and the chenille stem shapes and sprayed another very light layer of red over the area.

It looks even more unfinished at this stage than at any of the previous stages to me. It has the *potential* to be a finished painting but it isn't one yet. This is where it usually gets tricky. In the earlier stages I can, for the most part, go hog wild and work whatever I do into a painting, but as I start to get closer to a finished piece I have to reign in my enthusiasm a bit and really think through each addition before committing to it. Too much of this or too little of that can make or break the painting.

Paint Along Step 3


Step 3 of the Experimental Acrylics Paint Along:

This time we were to add some "playful brushtrokes" to our paintings. I did my usual curly swirlies in ultramarine blue with a little mars black added to it so that it reads more "black". I found that after I did this step the painting wanted to be turned so that the top is now that bottom. I may change that again later on as we add more elements, but that's what seemed right for now.

Monday, May 22, 2006

Paint Along Progress


These pics are of a painting in progress. On the Experimental Acrylics list we're doing a virtual painting class/paint along. The leader posts a new step a couple of times a week and each of us do each step and then post what we've done. It's interesting to see what everyone does and how unique each painting is even though we're all following the same steps. This painting is one 140# watercolor paper. The background was painted with a mixture of gesso and various blues. The second step was adding some texture. I did mine with large and small bubble wrap. I painted squares on the bubble wrap with prism violet and interference blue and then pressed them onto the background. I tried not to overdo it since I know we've got a lot of steps left to go! The next step, which I haven't had time to do yet because I have to wait until the toddler is sleeping to paint on the easel, is to add some "playful brushstrokes". Not sure what I'm going to do for that step just yet. And the step that's coming up I know will deal with spraying paint onto the painting with a spray bottle. Should be interesting.

Friday, May 19, 2006

Art Quote


This scan came out all funky as usual. In trying to get the gold accents, which I tend to use a lot, to come out looking somewhat decent the other colors look off. It's a no win situation. I think I may go back to taking digital photos of all of my cards that have any kind of embellishments that I know will be difficult to correct in a scan.

Other than the scanning problems I liked this card. It was for a Quotes swap. I happen to love quotes, so I usually won't pass up a quote swap!

Wednesday, May 10, 2006

Sunrise/Sunset


These are a couple of pieces I just sent off for a 4"x6" swap. The sunrise painting is okay. I think the foreground trees look too evenly spaced and uniform though. The rainy day sunset was just a sketch that I sent in because I didn't have time to do a complete painting. It's not a finished piece by any means, but I like the idea. Here in Indiana the ground in rather flat and you can see storms coming from miles away when you are out in the country. It's very dramatic, especially during the times of year when the fields haven't grown very tall. I love it when I can look out over the horizon and see where the rain starts and stops. This sketch was done with that in mind. If I were to work on a painting from this sketch I would do more definition in the clouds and use a little more of the reds, yellows and oranges. Everything got muddled in the sketch.

Tuesday, May 09, 2006

World Tree


This is "World Tree". I created this card (along with some others) for a swap entitled "The Great Earth Mother Goddess". I decided to post it here not only because I like the way it turned out but also because I wanted to show that pre-made stickers can be a part of a cohesive piece of art. The tree sticker in this piece looks like a part of a whole, not just something stuck on the top.

"World Tree" started with a base of earthy colored handmade paper, then I added the vellum tree sticker and another layer of a darker paper over that (in which the circle is cut). Then I put yet another layer of light green rice paper with silver flecks over all of this. (I use matte gel medium as an adhesive btw.) I then enhanced the overall effect with gold ink and watercolor pencils.

And just for the record...I don't have anything against people using stickers. I obviously use them myself on some of my ATCs. I just wanted to show that they don't always have to *look* like stickers!